
Inferior Alveolar Nerve Block: Step-by-Step Technique and Common Errors
Medi Study Go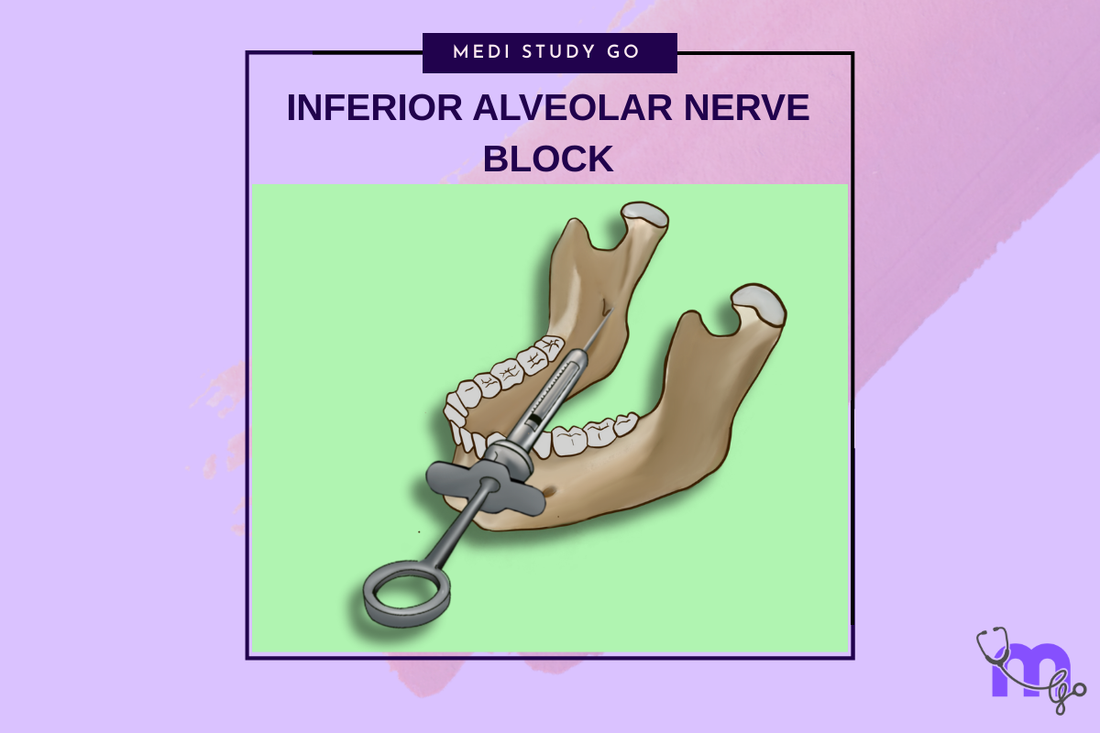
Related Resources
Local and General Anesthesia in Dentistry: Mechanisms, Techniques, and Clinical Applications for Dental Students Theories of Pain and Gate Control Theory: Relevance to Dental Anesthesia Mechanism of Local Anesthetics: Sodium Channel Blockade and Nerve Conduction Classification of Local Anesthetics: Amides vs. Esters and Clinical Selection Criteria Complications of Local Anesthesia: Toxicity, Paresthesia, and Management Protocols Dose Calculation and Contraindications for Local Anesthetics in High-Risk Patients Gow-Gates and Closed-Mouth Nerve Blocks: Advanced Techniques for Mandibular Anesthesia Nitrous Oxide in Dentistry: Pharmacology, Sedation Stages, and Safety Protocols Premedication Strategies: Managing Dental Anxiety and Adrenal Insufficiency General Anesthesia in Dental Surgery: Indications, Stages, and Emergency Preparedness Eutectic Mixtures and Topical Anesthetics: Enhancing Patient Comfort in Pediatric Dentistry
Key Takeaways
- The inferior alveolar nerve block (IANB) is the most frequently used mandibular injection but has a failure rate of 15-20%
- Success depends on accurate identification of landmarks: coronoid notch, pterygomandibular raphe, and occlusal plane
- The target is the inferior alveolar nerve before it enters the mandibular foramen, approximately 25mm from the injection site
- Common errors include incorrect angulation, insufficient depth, and failure to aspirate properly
- Supplemental techniques like buccal infiltration with articaine can improve success rates
The inferior alveolar nerve block remains the cornerstone technique for achieving mandibular anesthesia, despite its relatively high failure rate compared to maxillary injections. Mastering this technique requires thorough understanding of anatomy, precise landmark identification, and meticulous attention to technical details. This comprehensive guide provides a systematic approach to performing successful IANBs while avoiding common pitfalls.
Table of Contents
- Anatomical Considerations
- Patient Positioning and Preparation
- Step-by-Step Injection Technique
- Common Errors and How to Avoid Them
- Troubleshooting Failed Blocks
Anatomical Considerations
The Pterygomandibular Space
The pterygomandibular space is the target area for IANB administration. This potential space is bounded by:
Medially - Medial pterygoid muscle Laterally - Ramus of the mandible Superiorly - Lateral pterygoid muscle Inferiorly - Angle of the mandible Anteriorly - Buccinator muscle Posteriorly - Parotid gland
Understanding this three-dimensional anatomy is crucial for proper needle placement and avoiding complications.
Neural Anatomy
The inferior alveolar nerve, a branch of the mandibular division of the trigeminal nerve (V3), travels through the pterygomandibular space before entering the mandibular foramen. Key relationships include:
Course of the nerve:
- Descends between the lateral pterygoid and ramus
- Accompanied by inferior alveolar artery and vein
- Enters mandibular foramen 15-20mm above occlusal plane
- Protected by the lingula (bony spine)
Associated nerves:
- Lingual nerve lies anterior and medial
- Long buccal nerve courses over the anterior ramus
- Mylohyoid nerve branches before entering foramen
Vascular Considerations
The pterygomandibular space contains significant vascular structures:
Inferior alveolar artery and vein:
- Travel with the nerve bundle
- Risk of hematoma if punctured
- Positive aspiration rate: 10-15%
Pterygoid venous plexus:
- Network of veins surrounding lateral pterygoid
- Risk of intravascular injection
- Can cause distant spread of anesthetic
Individual Anatomical Variations
Success rates improve when clinicians recognize common variations:
Mandibular foramen position:
- Varies with age (higher in children)
- Ethnic differences documented
- Asymmetry between sides common
- Relationship to occlusal plane variable
Bifid mandibular canals:
- Present in up to 1% of patients
- May require multiple injections
- Can explain partial anesthesia
Accessory innervation:
- Mylohyoid nerve supplementation
- Cross-innervation from opposite side
- Cervical nerve contributions
Patient Positioning and Preparation
Optimal Patient Position
Proper positioning facilitates landmark identification and needle insertion:
Chair position:
- Semi-supine or supine recommended
- Mandibular occlusal plane parallel to floor
- Head turned slightly toward operator
- Good lighting essential
Mouth opening:
- Wide opening for visualization
- Maintain throughout procedure
- Avoid extreme opening (displaces landmarks)
- Support with bite block if needed
Operator Position
Ergonomic positioning reduces fatigue and improves accuracy:
For right-handed operators:
- Right side: 8 o'clock position
- Left side: 10 o'clock position
- Direct vision preferred
- Stable arm rest essential
For left-handed operators:
- Mirror image of right-handed positions
- Maintain direct line of sight
- Comfortable working posture
- Adequate finger rest
Pre-injection Preparation
Thorough preparation minimizes complications and improves success:
Tissue preparation:
- Dry injection site with gauze
- Apply topical antiseptic (optional)
- Place topical anesthetic (1-2 minutes)
- Maintain dry field during injection
Syringe preparation:
- 25-gauge long needle standard
- 27-gauge acceptable alternative
- Aspirating syringe mandatory
- Check cartridge integrity
Patient communication:
- Explain procedure briefly
- Warn about expected sensations
- Establish stop signal
- Reassure throughout
Step-by-Step Injection Technique

1. Landmark Identification
Accurate landmark identification is critical for success:
Coronoid notch:
- Greatest concavity on anterior ramus border
- Palpate with index finger
- Feel for deepest depression
- Maintains position during injection
Pterygomandibular raphe:
- Vertical tissue band
- Visible when mouth open wide
- Marks medial boundary
- Junction of buccinator and superior constrictor
Occlusal plane:
- Reference for injection height
- Usually at junction of middle and lower third of thumbnail
- Adjust for dentulous/edentulous patients
2. Determining Injection Site
The injection site is determined by the intersection of two reference lines:
Horizontal line:
- From coronoid notch
- Extends to deepest part of raphe
- Parallel to occlusal plane
- Marks vertical height
Vertical line:
- Three-quarters distance from anterior ramus
- Perpendicular to horizontal line
- Determines anteroposterior position
- Compensates for ramus width
3. Needle Insertion
Precise needle insertion technique ensures proper drug deposition:
Initial positioning:
- Syringe barrel over opposite premolars
- Needle parallel to occlusal plane
- Bevel oriented away from bone
- Steady hand position
Insertion technique:
- Pierce mucosa at determined point
- Advance slowly through tissue
- Maintain original angulation
- Stop when bone contacted (20-25mm)
If bone contacted too soon:
- Usually too far anterior
- Withdraw slightly
- Redirect posteriorly
- Re-advance to proper depth
If no bone contact:
- Usually too far posterior
- Withdraw half the depth
- Redirect anteriorly
- Attempt contact again
4. Aspiration and Injection
Proper aspiration and injection technique prevents complications:
Aspiration protocol:
- Contact bone, withdraw 1mm
- Aspirate in two planes
- Rotate syringe slightly
- Re-aspirate after rotation
Positive aspiration:
- Occurs in 10-15% of cases
- Blood fills cartridge visibly
- Reposition needle
- Never inject with positive aspiration
Injection technique:
- Slow deposition (60 seconds)
- Deposit 1.5-1.8ml solution
- Monitor patient throughout
- Stop if severe pain
5. Withdrawal and Post-injection
Proper completion prevents complications:
Withdrawal technique:
- After full deposition
- Aspirate again before withdrawal
- When half-withdrawn, stop
- Deposit 0.1-0.2ml for lingual nerve
- Complete withdrawal slowly
Immediate post-injection:
- Apply pressure to injection site
- Recap needle safely
- Position patient upright
- Wait 3-5 minutes before testing
6. Testing for Anesthesia
Confirming adequate anesthesia prevents procedural pain:
Subjective signs:
- Lip/tongue numbness
- "Thick" feeling
- Tingling sensation
- Patient report
Objective testing:
- Electric pulp tester
- Cold test (Endo-Ice)
- Gentle probing
- Response to drilling
Common Errors and How to Avoid Them
Technical Errors
Incorrect injection height:
- Too high: Above mandibular foramen
- Too low: Below nerve entry
- Solution: Use thumbnail reference
- Verify with anatomical landmarks
Improper angulation:
- Too lateral: Hits ramus early
- Too medial: Misses ramus entirely
- Solution: Maintain proper barrel position
- Keep needle parallel to occlusal plane
Insufficient depth:
- Stops short of target
- Fear of "going too deep"
- Solution: Advance until bone contact
- Average depth 20-25mm
Depositing below nerve:
- Gravity-dependent spread
- Incomplete mandibular anesthesia
- Solution: Inject above foramen level
- Consider supplemental techniques
Anatomical Misjudgments
Failure to accommodate variations:
- Standard technique in variant anatomy
- Ignoring patient age/size
- Solution: Adjust for individual anatomy
- Consider alternative techniques
Incorrect landmark identification:
- Confusing coronoid process with notch
- Missing pterygomandibular raphe
- Solution: Systematic palpation
- Verify multiple landmarks
Ignoring bone contact:
- Injecting without bone reference
- Fear of periosteal injection
- Solution: Always contact bone
- Withdraw 1mm before injection
Procedural Errors
Inadequate aspiration:
- Single plane only
- Too rapid
- Ignoring equivocal results
- Solution: Two-plane aspiration
- Slow, deliberate technique
Rapid injection:
- Patient discomfort
- Tissue damage
- Incomplete anesthesia
- Solution: Minimum 60 seconds
- Monitor patient response
Premature testing:
- Testing before onset
- Misinterpreting partial anesthesia
- Solution: Wait 3-5 minutes
- Use objective measures
Troubleshooting Failed Blocks
Immediate Failure
When anesthesia fails to develop within 5-10 minutes:
Reassess technique:
- Review landmarks
- Check needle length
- Verify proper angulation
- Consider anatomical variations
Supplemental techniques:
- Buccal infiltration with articaine
- Intraligamentary injection
- Intrapulpal injection
- Alternative nerve blocks
Partial Anesthesia
When incomplete anesthesia occurs:
Assess distribution:
- Which teeth affected?
- Soft tissue involvement?
- Unilateral or bilateral?
Common causes:
- Accessory innervation
- Bifid mandibular canal
- Cross-innervation
- Inadequate volume
Solutions:
- Supplemental infiltration
- Gow-Gates technique
- Vazirani-Akinosi method
- Mental/incisive nerve block
Persistent Failure
When blocks repeatedly fail:
Consider systemic factors:
- Infection/inflammation
- Previous trauma/surgery
- Genetic sodium channel variants
- Psychological factors
Alternative approaches:
- Different anesthetic agent
- Increased concentration
- Added hyaluronidase
- Sedation techniques
Managing Complications
Hematoma:
- Direct pressure
- Ice application
- Patient reassurance
- Document incident
Nerve injury:
- Usually temporary
- Document thoroughly
- Refer if persistent
- Avoid re-injection
Trismus:
- Heat therapy
- Gentle exercises
- Muscle relaxants
- Time usually resolves
Advanced Considerations
Using technology:
- Ultrasound guidance
- Nerve stimulators
- Computer-controlled delivery
- Future innovations
Quality improvement:
- Track success rates
- Identify patterns
- Continuous education
- Peer review
The inferior alveolar nerve block remains challenging even for experienced practitioners. Success requires thorough anatomical knowledge, meticulous technique, and ability to troubleshoot failures. By understanding common errors and implementing systematic approaches, clinicians can significantly improve their success rates and provide better patient care.